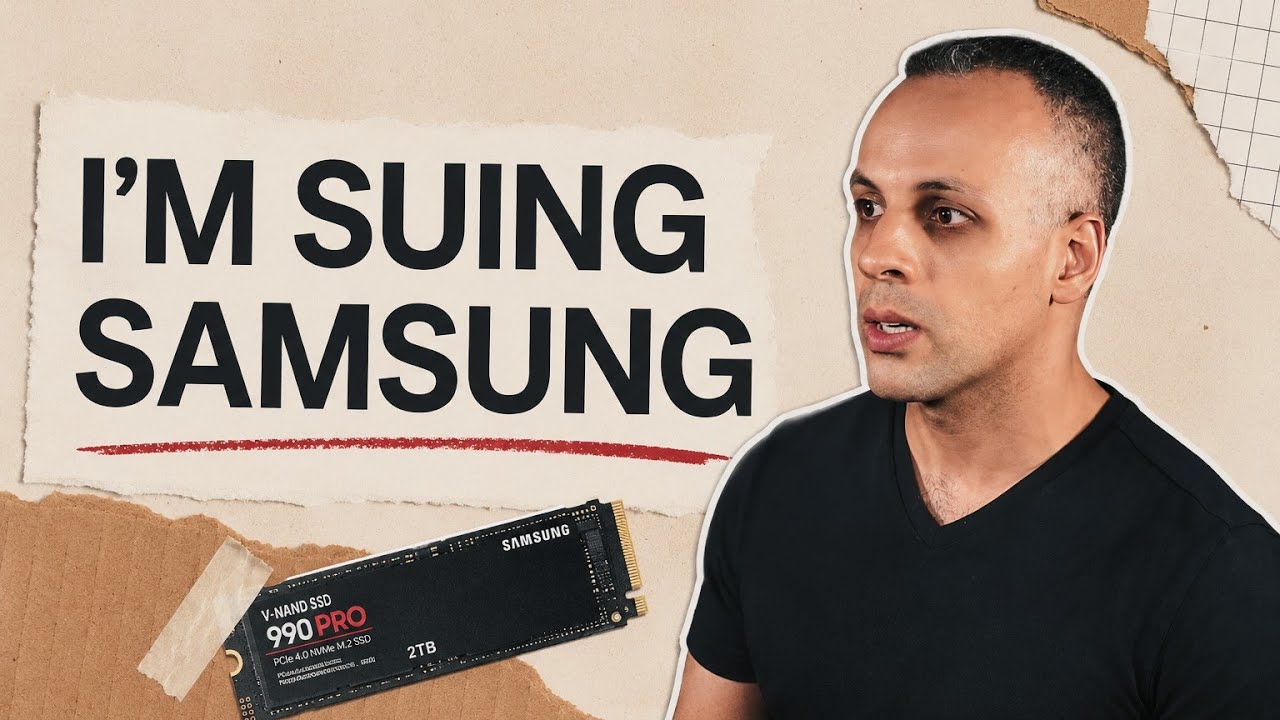
Servei d’un Bugatti Veyron: de 20.000 £ a 1.193,83 £
Mat Armstrong revisa el seu Bugatti Veyron amb peces creuades del grup Volkswagen i redueix la factura, però també revela riscos i costos ocults.
Un servei, diversos errors i una xifra de 20.000 lliures
Mat Armstrong comença amb un repte directe: segons explica, un servei del seu Bugatti Veyron a la xarxa oficial costaria unes 20.000 lliures, i vol comprovar quant pot reduir la factura fent la feina al seu taller. El cotxe no arriba en estat normal de manteniment. Té un ralentí irregular, un avís de motor i una bomba del canvi que continua funcionant quan hauria d’aturar-se.
Ja havien buidat l’oli del motor i del canvi i retirat filtres i bugies. Armstrong diu que Bugatti no li ven peces fora del seu centre, de manera que combina components de l’especialista Simon Furlonger amb referències d’altres models del grup Volkswagen.
El vídeo no mostra una tarifa pública que permeti verificar que totes les operacions equivalen al pressupost de 20.000 lliures. Tampoc valora les hores, el taller, les eines o el risc assumit. La xifra final és el seu desemborsament, no el preu universal d’un servei equivalent.
El filtre correcte obliga a recórrer a un especialista
El filtre d’oli retirat porta el nom del fabricant Hengst, però buscar-ne la referència no dona un recanvi idèntic. Armstrong mesura alternatives i arriba a comprar un filtre semblant, però decideix no improvisar: Furlonger li proporciona una unitat adequada per al Veyron. És una primera excepció important a la idea que qualsevol peça compartida es pot trobar en un catàleg general.
El motor W16 utilitza 16 taps de buidatge, tots amb volanderes noves. El vídeo indica oli 10W-60 i una capacitat total aproximada de 16 litres. L’equip n’afegeix primer 14, preveu fer circular el lubricant pel motor i els refrigeradors i reserva la resta per ajustar el nivell sense sobreomplir.
La caixa de canvis també incorpora diversos filtres. Un dels recanvis arriba a través de l’especialista i coincideix amb la peça retirada. Els acumuladors de pressió funcionaven i es reutilitzen; Armstrong afirma que ha identificat unitats semblants en un Volkswagen Lupo per unes 200 lliures, però admet que no ha investigat prou aquella equivalència perquè no necessita canviar-les.
La bomba del canvi demostra que semblar igual no és suficient
La bomba electrohidràulica és la part més il·lustrativa. El creador localitza un conjunt atribuït a un Audi A6 Allroad per 1.121 lliures, davant dels 3.610,59 dòlars que mostra per a la referència de Bugatti. Finalment troba el motor sol per 268 euros, en compra dues unitats i traspassa el connector original perquè els terminals semblen compatibles.
En la primera prova, la bomba gira però la transmissió només arriba a uns dos bars i no pot seleccionar marxes. Una bateria descarregada complica el diagnòstic, però el problema real és més elemental: els dos cables han quedat amb la polaritat invertida i el motor gira al revés. Després de corregir els pins, el circuit genera pressió i la caixa torna a engranar.
L’estalvi és real dins del relat del vídeo, però també ho és l’avís. Dues peces poden compartir dimensions, fabricant o connector i diferir en polaritat, calibratge, revisió o condicions de treball. En un hipercotxe, validar una equivalència exigeix més que comprovar que encaixa físicament.
Setze bugies, bobines incompatibles i sensors MAF adaptats
El Veyron necessita 16 bugies. Armstrong diu que les troba per 17,37 lliures cadascuna i compara aquest import amb 57 dòlars per unitat a la relació de preus que utilitza. També mostra 245 dòlars per cada bobina i 6.627 dòlars de mà d’obra per a una operació calculada en 23,5 hores.
La primera adaptació de bobines, però, no funciona. L’equip intenta reutilitzar els segells de les peces originals sobre bobines modernes, però després de muntar-les conclou que la longitud varia lleugerament. Armstrong explica que més tard ha trobat la referència correcta, utilitzada en un Volkswagen Phaeton o un Bentley Continental GT de sis litres, per 53,99 lliures. El vídeo no arriba a demostrar aquella segona alternativa en circulació.
Els cabalímetres MAF presenten un problema semblant. Un número gairebé idèntic, amb una lletra addicional, correspon a una carcassa i un connector diferents. Abans de retornar-los, l’equip prova els sensors i el motor arrenca amb un ralentí més estable. Desmunta aleshores els elements electrònics de les carcasses noves i els instal·la a les originals del Bugatti.
El resultat de 1.193,83 lliures no és una factura comparable
Després de corregir la bomba i adaptar els MAF, el motor funciona uniformement i no mostra els avisos mecànics inicials. El vídeo inclou una integració patrocinada de carVertical; la neteja amb gel sec, els treballs cosmètics i un escapament de titani són promocions o modificacions, no part del servei bàsic.
Al final, Armstrong afirma haver gastat 1.193,83 lliures per revisar el cotxe, resoldre les avaries tractades i deixar-lo funcionant correctament. La dada és útil com a cost de peces del seu cas, però no incorpora una tarifa de mà d’obra ni demostra que s’hagin executat totes les inspeccions, actualitzacions i verificacions d’un servei oficial.
Tampoc totes les proves van sortir bé: les primeres bobines no encaixaven, la bomba va funcionar a l’inrevés i dos jocs de MAF no coincidien completament amb la peça retirada. El valor del vídeo no és una recepta que es pugui copiar, sinó veure el procés d’identificació, error, mesura i correcció.
Què inclou el manteniment que Bugatti defensa
Bugatti presenta els seus programes com una combinació de manteniment, suport, historial, actualitzacions i garantia. El Loyalty Maintenance Programme adapta els paquets a usos diferents i, segons la marca, redueix costos d’explotació. Certified hi afegeix revisions i intervencions de socis autoritzats.
Per als Veyron i Chiron, el Passeport Tranquillité pot cobrir manteniment estàndard durant dos o quatre anys i oferir extensions mecàniques i elèctriques. En vehicles certificats de segona mà, Bugatti anuncia una inspecció de 110 punts, un servei anual i garantia limitada. Aquestes prestacions no proven que qualsevol marge sigui imprescindible, però expliquen per què el preu oficial no es pot comparar només amb la suma de filtres, oli i bugies.
La xarxa també assumeix documentació, formació, estoc, diagnòstic, responsabilitat i garantia. Una reparació independent pot ser més barata i competent, però ha d’explicitar què inclou i què trasllada al propietari.
La lliçó pràctica és verificar, documentar i mesurar
El vídeo defensa amb força el dret a reparar i mostra que un Veyron comparteix proveïdors i tecnologies amb altres vehicles del grup. Creuar referències pot evitar sobrepreus i mantenir cotxes antics en funcionament quan el fabricant limita la venda directa. Armstrong mateix, però, agraeix l’ajuda de Furlonger i recomana aquell especialista als propietaris que no vulguin assumir el procés.
Abans de substituir una peça cal comparar número, revisió, dimensions, materials, rang elèctric, cabal o pressió i programació. També convé registrar parells de collament, fluids, proves i canvis. En un cotxe milionari, la traçabilitat afecta seguretat, assegurança i revenda.
Armstrong no demostra que un servei oficial valgui només 1.193,83 lliures. Demostra una cosa més concreta: amb coneixement, temps, infraestructura i tolerància a l’error, moltes peces es poden obtenir per molt menys. La diferència entre un recanvi barat i un manteniment complet és precisament tot el treball de validar-lo.
Contrast i context
Fonts consultades
-
01
YouTube — Mat Armstrong I EXPOSED BUGATTI'S SERVICE & REPAIR COST'S
-
02
YouTube Canal de Mat Armstrong
- 03
- 04
- 05
- 06
Font de treball
Transcripció amb marques de temps
Consulta la transcripció
-
0:00
, obre el vídeo en una pestanya nova
Brigatti wants £20,000 to service. Mar Brigatti Veyron. Today we're going to do it for a lot cheaper. It's a well-known fact. Brigatti Veyron's are expensive to maintain. When keep £1000,000, this is £18,000 plus that. At least £7,800 to do about £25,000. Yeah, very, very spicy. And what do you expect? It's a super expensive car. Of course it's going to be expensive to maintain. But what if that £20,000 service costs was worth nowhere near that price? All the prices are here at the old Brigatti service and so on. It's rumors. It's not the truth. I'm really paying for the engineering. The work needed to do the repair and the parts. Or I'm just paying for the badge. Well, now about to find this out myself. Good, huh? Any more things on it? Yeah. Because since buying my Veyron, even though we managed to get it running in the last video, it still has a bunch of problems. No, no, it's a good one. But now it's all flush in every lot on the desk. A misfire causing the engine lights to come on. And we still have that transmission fault. But somebody's telling that book to keep up with me, doesn't need to. We suspect that this car hasn't been serviced in a really long time. Gritty girl. It was a state of it. And in the last video, we managed to get out all of the oil of the gearbox. Oh, we're all in. And the engine, the flog is stuck somewhere. And take out all of the filters and the spark looks. But I can't just call up Brigatti to buy new ones. And the car would have to be on fire with ourselves. That can be part of the order, this thing. So now we've got to figure out where all of these parts come from. And after that, we can figure out whether this service costs is worth anywhere near the price Brigatti charging. Right. These are all the bits taken out, which is needed for the service. And hopefully, this car will run in right. The easiest thing to do in this situation now is just to call Brigatti all of the parts the parts come and we can fit them. But we know Brigatti are not going to sell us the parts. And less the car is at their place. So we could spend hours now trying to find exactly what car, what Volkswagen car, the spark looks have come off, what Volkswagen car, the coil packs have come off, what Volkswagen car, these airfits will come off because really I highly doubt that any of this is Brigatti specially made. Or what we could do is contact a Brigatti specialist like Salman Furlonga and luckily they were sellers some parts to service the Brigatti. Now Furlonga is a Brigatti specialist and they offer services for very runs. Also a lot cheaper than Brigatti themselves. And whilst I've managed to cross-reference a lot of the parts I need, there was some usural rule done. And I've managed to convince Salman Furlonga to sell me some of the parts for this service that I just couldn't find anywhere else. Right, over here we think we've got the majority of this stuff. Some stuff we've got from Salman Furlonga. Some stuff we've had to cross-reference ourselves. And we still don't know whether it's going to work. We're only where we're going to find out as we're being fitted to the car. I'm going to explain what's cross-reference and what isn't cross-reference. We'll start feeling it. But the first step I think we need to do is fit the engine or your filter and the engine oil before we move on to anything else. So let's start with the engine. Let's go. So this is the oil filter that's come out of the veiron. The first place to look is for the part numbers. We're going to ignore the Brigatti part number for now and look at who made the filter. Which is a company called Hengst. And when you search that and the Hengst part number, you can't really find anything.
-
3:56
, obre el vídeo en una pestanya nova
Now the issue we have here is that you can see it has a pattern number on it. So Hengst may have made this filter for Brigatti and because it's patented, agreed not to sell it anywhere else apart from Brigatti. So our next step was to measure the filters and we still couldn't find one which was an exact fit. Now the was a Hengst filter listed on eBay which did look really similar and was pretty close to the measurements and I have ordered that but turns out I didn't need to because for a longer supply their own oil filter in the Brigatti service. And I managed to get this one from them which solves so many problems. I can now be a 100% sure that I'm putting in the right oil filter. So in the filter goes into the house in, I've already put a bit of oil into the house and so it's not good everyone could completely dry and then I could screw it back into the engine and tighten it up one engine oil filter in. So far I'm not seeing the 22 grams work. Next up is the 16 sun plugs. Each of these have got a new washer on and I'm going to put them all back in. Okay so that's all the engine, sun plugs in all 16 of them back in with washers. Now we can put the engine oil in that will move on to the gearbox. The Brigatti takes 10W60 oil and it can see that because it says it on the oil cap. It takes 16 liters but we need to fill 14. We're on it up to 10 which is so it all goes round that oil callers the engine and everything. Then if we need to add more, we'll add the rest. The best way for us to find out how much oil it needed was just to measure the amount that actually come out and it was 16 liters. Right, 14 liters in and then we'll add the extra two liters. Once we know that's correct we don't want to overfill it. So that's engine oil and filter in. Next step is all the gearbox stuff which starts going a little bit tricker. There was loads of different filters which go into this gearbox. So it's clearly vital that the actual oil that's in it runs really clean. If there's that many filters in there, we do have one of them. So this was the one that went underneath the big gearbox filter and it looks like. Some are far along that have actually made. It filter exactly the same with it. In fact, they've not, I don't think they have made it. It looks like the exact, it's the same company, look, pal. So again, I can put this oil filter into the bottom of the gearbox with confidence knowing it's the exact same one that come out. It slides up sort of pushes in place and then there's this aluminium huffer which goes underneath it which bolts in with a load of bolts and then there's one drain plug which screws in underneath it. After that, I've got one more drain plug which is on the side of the gearbox to put back in with a new crush washer on and tighten it all back up. Then we can go to the top. Okay, so before we fill the fluid into the gearbox, we need to start by putting the filter in and everything else. So we've got the accumulators and begatty changes these, but when we spoke to someone for a longer, if they work, you shouldn't really change them. And that saves us having to outsource these, but I'm pretty sure they're almost similar to the ones on the Macarons suspension and also the Lamborghini E gear accumulators as well. Think they're similar to them, but we haven't really researched it enough to find them because these actually work. These just store the pressure and I think, doesn't say on this one, but they can store up to a hundred bar or some it's silly. So if I remember the order this goes in, this one first,
-
7:43
, obre el vídeo en una pestanya nova
then we address the pump then the other one goes in. Now the funny thing about this is that after a little bit of research, I found out these accumulators are the same of a Volkswagen loop part and they use for a similar purpose inside the gearbox. I'm from Volkswagen, these are 200 pounds. And these accumulators are exactly the same as the ones I've been the begatty. Two of the accumulators were replaced, $617 of these times to $1235. So it's safe to say, if I do ever need to change the accumulators, then I'm going to save a fair amount of money. Before we put the other accumulator in, this is where I'm hoping, or fix. So here's the gearbox pump and obviously we had the break in the wire. We taped it up like temporarily to see if that would help, but it still would do it. It didn't help. So I was trying to find these pumps everywhere because I know that begatty replaced them every year for some unknown reason. I don't know why you would do that unless it is a week's part of the car. Now what I found here is that this pump is actually used in an Audi A6 all-road as well. For some part of the gearbox, but still it is £1,121, which is still a little expensive, but it does look exactly the same. Now from begatty, these pumps are, that was $3,610. In 59 cents. So the A6 pump is still cheaper, but what I found better than that is that I could buy just the pump motor alone for 268 euros. And for that price, I bought two of them, especially if I'm good out for a place to meet year. But when it arrived, something did look a little different. Now looking at it, it looks like it could be sorted if I couldn't. That plug could be different, so maybe I have to switch over the plugs. And that's exactly what we had to do. I've got a deep in-into-into-the-original plug where I could push that in and deep in these wires from it, and I'm doing the exact same on the new pump that I've just bought. And luckily, both of the pins on each motor look the same. So I should just be able to push the pins in the new motor straight into that old plug if that makes sense. Once the pins are pushed in, I can then lock them in with this pink clip, and that is all sorted. So that should work now. But we now need the hydraulic part to go on top. So we know that that was that way around, because he's just switched that onto there. See if that works. There's only two bolts holding the motor to the actual hydraulic pump, then it comes apart. It's slightly different in there. It's just gone. This has got really like, look, it's got like a bearing on there. Like on that, where this one's got like just a housing, but then the bearing is the bearing in the internal. Yeah. So even though they do look slightly different, it does still fit. And it looks like the motor that I've bought may have been a newer model, which have changed the bearing to be internal. So if fitted it together for now, but I guess the true test is when we put it in the car. Was that was fitted? My dad decided to take apart the old motor. To see if there was any issues with it. And this motor looked extremely old and burn. Well that's been sender then. Fuck it's burn out. It does. It smells burn. Yeah. Right. Let's put this in, see if it fits. We've got to connect up the pressure pipe to the motor, tighten that up and then slide the motor with the pump attached now into its position on top of the gearbox tank. Once that's in its place, I can then tighten up the return line and then finally connect up the motor and tighten it all down to the top of the tank.
-
11:55
, obre el vídeo en una pestanya nova
Pump is in. We just got a hope it works. Next step, we can now put in the other accumulator, which is here. Again, it works. Holds pressure. Don't need to replace it. So in this goes. The accumulator is on. Now the next thing that we fit are the filters and those filters were really hard to find and even some inferlonger who actually does this top of surface, doesn't replace these filters. They look like this. So these are the old filters that come out. But because they're metal, there's probably a company that will make these. But actually trying to find, again, it's this pal filter, which is all going to be patented to be a getty of these top of filters because we can't find another gearbox which uses the same tank or anything like that. So it's going to be really hard to cross-reference any of these. But because they are metal, we've been told to ultrasonic clean them, which is off for cleaning jewelry and metal parts. All of these are going to come. I've actually ordered one, but it's not coming yet. But we know just a guy who's got one. So that's where these filters are going to go for that. We rip off the ganties. But shit, sure. Should we go and see if he's in? Let's go and see. And of course Bob was in. And we need it to borrow his tools. He's ultrasonic cleaner to be more precise. When you pull it out, chips. So it just shakes the water. Really fun. They're not that special. And yet, that's all it seems to be doing. It goes in a cleaner and it's kind of just shaking the water about. To load the dirt, it's coming up the filters. Leave the filters in for a while. Then it's ready to pull them out. And that's job done on the gearbox filters. All done. Good as no. Thanks to Bob. At the machine shop. Let's get back. Before any of this, just linear get it in them. And back on the gearbox filters. All it's there to do now is start to fit them all. I'm of course hoping that after doing all of this service, I'll misfire that we've got, especially on Comed Start, Disappears. And also the fault with the gearbox disappears as well. Which we did get running. But the issue with that is that the pump seemed to stick on sometimes and overpressurise the system. I know from Mark McCann's video that he cleaned out the pressure relief valve on his. Sift that was the issue. And that would definitely be the plan of once of doing this service. But first, I want to narrow down everything else on this gearbox. And make sure all our parts actually work. And it's time for the final filter. Now to go in the gearbox sound, slide in all the bolts going, tighten them all down. And then it's time for the gearbox oil. 14 liters. It takes 18 liters of oil. We've got 14 because 14 come out. 14 is going back in. This is what's going in. DCTF is for dual clutch transmission, wet clutches. This is what we found works. Well, apparently works. So let's pour it in and hope. And this actually does the job. In goes 14 liters of the transmission fluid which we've got to make sure is 100% spot this. Right. I think that's 14 liters in. We have got a dipstick. So I can check it, but I think when we run the car, it will circulate more. So this is probably going to think it's over four. Yeah, like massively over four, we're the minute. But we know 14 liters come out because that's what we measured. I think once we start it, it will circulate round. And we might need to add more, might need to add more. But that is in, I hope, I hope that works. What we could do now is we could connect the back to it and see if that pump is before we continue doing everything at anything else. Or we just put everything together and then just connect it to it at the end.
-
16:11
, obre el vídeo en una pestanya nova
Depends, what do people want to do to go? Hands up, commit to it. Commit. Commit. Commit. Put the whole thing together. Right. Okay, so putting the whole thing together, then we're going to find out whether we do it. In that case, let's move on to the Haldex, which is underneath the car. We've got the front diff system and it uses Haldex, so it's got like clutches inside of it. So I think the way it works is how much speed you get. It engages more clutches and it engages more front wheel drive or less front wheel drive at certain times. Pretty much. The prop shaft, which runs directly through the center of the car, then connects up to the Haldex system and the front diff and the clutches in the Haldex system. Decide how much front wheel drive power you need at certain times to keep grit and because it has clutch and fluid, it also has filters. Again, we've just cleaned up the OEM filter in this the same way we did for the gearbox filters. Then we're going to pop that back in place, tighten up the bump and after that I could then put the drain plug back in and then move on to fill in it with some fresh oil. So this is the Haldex oil. We only took about half of the heat around so I'm only expecting about half of the heat to go back in. Yet this Haldex system doesn't actually take much oil. So it's important that we put it all in. That must be right, because only after all. And even though it doesn't take much oil you'll be shocked what we got a charge for that oil. The $187.99, $191, 1991, when I got my bottle for £29. No more than what's going on there than. But now Haldex is in and the fill plug is all tightened down. Next step to go in is spot plugs. We're not putting these in and these are really cake-tucked, but Volkswagen spot plugs really easy to cross-reference. You literally just have to put the number, into Google and you can find it. Cross-reference it to the NGK spot plugs. These are I LZK or 8A and you can see on there I LZK or 8A. So same plug. Go in, don't need gaping around anything because it's in new car. Put these in. We know these are work. It's the coil packs. We're going to struggle on. Let's get these in first. Right, 16 spot plugs. These go in this car and as these are really easy cross-reference, I found them for £17.37. The Gat A, a charge in. It's a $196.00. A lot more than what we found out of this. You also won't believe the label they charge to do this either. Which will get onto later. For now, I'm putting 8 spot plugs in my side of the engine. What's my dad is putting the 8 spot plugs in onto the side of the engine that he's working on. Which again wasn't too difficult of a job. So spot plugs are in. We know they're original. We know all the filters are original and that is all going to work. But this is where it's going to get harder because these coil packs are extremely hard to find even though they do have a Volkswagen number, they seem impossible to get know why. But the coil pack that almost like the same as a 1.8 Audi TT. The only thing we can see different obviously the top is different but this is a really old style top. This is the new style top. The plugs the same inside. But the seal, here, which goes which sits in the car which you can remove. So that's seal. Come on. And then we can remove the seal of the new coil packs and put the original seal of the Bugatti coil packs onto the new coil pack. We're working that out of the job. A little modification that only thing has changed is this seal. But I don't know. I don't know. We've committed to trying it. If anything needs
-
20:38
, obre el vídeo en una pestanya nova
going to be upgraded because these are like technically newer than these. We don't know if these are full separate by changing them. It's not going to harm it unless they don't work. Looks like we're going to change over all the seals. Let's hope. This works. So we got to work. It's switching over all of the coil packs seals. But since I filmed this video I've actually found the coil packs that this car uses. For 53.99 each and the same coil packs of a Volkswagen Faiton or a Bentley Continental GT with a 6-liter engine. But first let's see if these ones actually work. And if they don't, they can always order. The correct ones which are found. Now time to install them. And everything's looking good so far. They all push into place and the original plugs fit into them. But how much does Bugatti charge for this? It's a 16-inch coil. $3,923. To $145 each is crazy. And the labor to fit it all. $23.5 at 6,627. Just for the labor. 23.00. And a half hours to do this. Yes we already have the car stripped apart. But I feel like we'd have to be working in slow motion to make this job 23.00. Okay, spotplugs in coil packs in gearbox pump, gearbox fluid, everything is in. I've not put the air filter in just yet because the engine cover has got to go before the air filters. And this car is going to the ice blasters to make it nice and clean. Get all this could off before we find out whether this is worked or not. When a pick took this car we noticed that it's not been looked after the best. It's easy to forget sometimes that this car is worth way over a million pounds. And could potentially be a lot more than that in the future. So to make it spot on I'm taking it to the ice blasters. Let's go. So the ice blasters use dry ice to freeze the dirt that's on the car then hit it off with ice as well. There's a more technical explanation which the guys will explain on the video that they filmed which I put a link in the description for and you can also book your car in with them as well. But the good thing about this big aty is when you do put the vene into car vertical the check comes fully clear. There's no outstanding finance it's never been stolen and there's no records of it ever been damaged. I could see the full mileage history of this car and I could see that since 2023 is barely moved. On top of that I could see the full timeline of the car and this car got imported from Dubai and I can see that it comes to the UK in 2018. I could then also see every time it's had a number plate change or ownership change. So the car's all done. It's looking nice and fresh once again. Back to how it should be so it's back on to Matt. Now if you did check a car out on car vertical when it wasn't an accident then it's unlikely to show you photos of when the car was damaged in auctioned off of the car crash auction site. So keep that in mind for now the brigade is back in the workshop and the very run is back from the ice bastards and it's looking so clean like everything's like back fresh as you say I want to bring it back and they can coat it with like a protective material as well so prevents it from getting all dirty again. I'm just notice all the suspension. Look how shiny they are that is mega and remember if you're on a set your car out of a vertical you can do with the link in the description box below and I put a discount code which is on the screen right now so make sure you're checking your car out before you buy it. Right it's a big big moment now we're about to find out whether all our service kit
-
24:35
, obre el vídeo en una pestanya nova
is actually works. First thing we're going to do is see if the gearbox pump builds a pressure and I've got to connect the jumper pack on because it seems like all batteries got a little low. Right out and the pump come on. Pump pump in and cut out. Oh oh but then it come back on again which isn't a good sign should only come on wounds to build with the pressure but it kept coming back on. Well yeah the only reason to keep pump it is if if it didn't have enough pressure, no new air can find out it's cooking the oil tell me. Maybe there's a fluid leak or pressure leak somewhere. Yeah let's put the oil tell and see what pressure it's got so that's have a lot. The oil tells now good to tell me how much pressure it's built up in the gearbox so it's only at two bar of pressure which is effectively nothing. It's only at two bar which is not enough to shoot. So if I try to ship it yeah it's not good as shit. The only thing that thinks if you try and start it and then if it pumps some fluid around but the only other thing we could have done is wide the pump the one we ran so then it's spinning backwards and not spinning forwards. Yeah that's spinning and it's not building up any pressure. So we fell at the first hurdle to eliminate that it's gotten nothing to do with our dead battery. We're going to get the car in the ramp so we can remove the old battery and go and buy a new one. That's going to work. The battery is completely dead so we're going to replace that as well along with our service. The battery comes out from underneath the car even though you can access it from the front storage area it has to remove from underneath. Here's the old one which looks like it's already been replaced but these AGM batteries once they go flat it's really hard to revive them. So here's our new one from Halford's securing that in and never could push it back up into the frame and tighten it all down as one new battery installed. We're going to see one of it builds up gearbox pressure. Two whether it's actually start saw. Three whether on service pack works. Three whether the coil packs and everything work. It's a huge moment. I'm just going to start it and then turn it on. Let's see. That ran good. That sounded smooth. That sounded well smooth. That sounded like a jet. That sounded way smoother. So if it goes into neutral. No. When it again. That first start or not was a little bit of false hope. Oh now it's struggling. Now it was misfire. Every light is on the day and the engine light was flashy. That was not good either. We've run in on a couple of cylinders. That was not good. Every light was on the dash end and on top of that after a scan the car with the auto we were still getting multiple cylinder misfires. Maybe those coil packs didn't work after all. I think I think we changed the coil as back to the other ones. Try that and then try the pump that way round. Let's try it. Red's going on to the left and so brown's going to the red and black's going to that one. So let's send 12 volts to that and see if pressure comes out of there. Oh is it going to start coming out of that one? There's potential that we've wired the pump the wrong way round and if that is the case then it means that the pump is spinning the other way around. Causing it not to build pressure. So what we're doing now is I'm going to connect it back up to the car, activate it and see which way the pressure is coming out. Nice wrong way. Yeah it's sucking there and blowing there so these are the wrong way round. That's why we're
-
29:22
, obre el vídeo en una pestanya nova
getting pressure. So this needs to go with the way round. Let's do that. Silly me. The water's with the wrong way round and there was only a 50-50 chance I got it right all wrong and I got it wrong. But now as the chance to get it right my flipping the wires round. Now we should have that blowing in this sucking. Go. Yeah. Okay. Let's open this works now. With those wires switch around I could now fit back in the pump and everything else on the gearbox and whilst we was there was also going to change back the coil packs to the original ones because I don't think the car liked our aftermarket ones. And 23.5 hours later it was ready to try again. This is all in and clean this cross. It's going to work. Do you think it's crossed? You're that confident? Yeah. Well by your little. If Tony's our confident on that new drum. They're like constant on that constant. Mark. The game box is going to work. I think the misfire is still going to be there. Because all we've changed is a spot because it's an old coil is back in now and I think it is the map sensors. I think it is. But we ain't got them yet but let's see let's see let's see what happens. The pump prammed up again once we open the door. Now we add to weight. When do we start panicking? No, no, that's just building pressure when flames. If it goes bang. Can you stop it now? Unless you can quickly upload this box and take the way out. Slow and down. Slow and down. Slow and down. The goose and the moat just burning. We're going to pressure in there. You're going to have to get 100% that was not for ages. That was not building pressure for ages. Yeah but it did have two bars. Now time to see if our pump is actually worked. Yes, Bob. Park. Neutral. Park. Just put the pins on the wrong way. If I was you start it. We call ran. But it's still sounding like the odd time had a bit of a misfire. And you like? Not yet but we are bouncing a bit. It's seen when the car come off the cold start. It started to run a lot better. That's running loads better. Got a cool light, that obviously we didn't put the cool running in. Yeah, give it a scum. If nothing comes up, believe it. Tomorrow morning we'll come back and cold start here. And then all spot-plug change. Okay, coil packs didn't quite work. They might have been in just a tiny but that's it we're learning. And so far the gearbox pump hasn't got stuck on. But we still think we have a small misfire from the cold start. But it seems fine when it's more. What do you think? I don't know whether that's normal. It's so hard to attack like the needle. You can see the needle which is a bit, see it just drops every so often. Just like a little, like, yeah it just has a little pot now again. Yeah, yeah, I can't say that it's an even one. And the thing is when we scan the codes, it doesn't have any faults on the engine. Let's go home, it's the sleep. See you in the morning. Good morning. This is the moment of truth over we're taking it apart again. Or we're happy with it outruns. But let's see if it runs lumpy on up. Good start. That was quick. This is legit cold start from the very first start of the day. Come on. No engine right? I don't know if that's normal. The initial cold start I'm gonna get it get it get it get it get it get it get it get it get it get it get it Got it's out. Yeah, there's no light. So there's that normal when it just chasing it round. Because it's soon now as we come on full site, it's far on. That's way too much weight. Where's the
-
34:59
, obre el vídeo en una pestanya nova
number of more years to be able to do it for ages? Well no engine light. This still feels necessarily in as well. I think that could also be causing issues. But I don't want to put it in without doing the maps. I think that we should definitely do the map sensors just to eliminate everything. According to the car, that's normal because if it wasn't normal, it would flag an engine light on the dash. And it's not. So it don't sound normal. It could just be normal. The only other thing that could be causing is lumpy idol at the map sensors. And the easer in charge of telling the ECU how much air is flowing through the intake so then it can calculate the fuel to put in the engine. And these might not necessarily flag a fault or but if they give a faulty reading, they could cause that lumpy idol. So I'm going to order some map sensors and we'll fit them later. Right, engine base going back together. The first thing you're going to see in it is this, and you might notice it is blue and supposes it there. That's because the car underneath this map, it is blue. And I want us to do what I want to see whether it is all blue underneath. So later, we are going to be taking off all the wrap to see if the paint is all good. You're going to the mod of done. Boom! Wow, crazy. The engine cover is blue at a screaming class. It's a big class of your body. Maybe I'm not your usual brigade owner. But we're here to break the mold. I've had the engine cover painted to color match hopefully the rear end of the car in this dark blue. And I can now refit the logo into the engine covers and fit them onto the top of the charge coolers at the back. That's looking way better. In my opinion, now all the air filter housing can start to go back into the engine bay. This just bolts down, each side, and then there's actually a little cooler part which will slur it. Hence why we had to drain some of the coolant to do all the spark plugs and coils. That is looking sexy. Really, really nice. It's going to look even better providing that what isn't the leaf all of this is the same color as that. Now we do, we can see that it is ppf on the corners. You can see so it's wrapped over the top of the ppf. So we're hoping the paint's going to be okay. Now it's time to make it this car my own. We still don't know whether it's going to drive okay until we drive it. We don't have the map sensors just yet so we're still waiting for that. Then the air filter will come in which we'll show you as well. For now, I think this is going to be a scary moment but I think we need to start taking off the rack and hope for paint to do good in the near. We'll always go off forward and stop for a bit off. So far, this brigade has been a bargain. Very many minor got it for under a million pounds and these are selling for well over one point five to the minute and all the folks that it had on the car when it bought it are almost fixed. But one beside it here is going to be when we remove the rack if the paint is going to be any good because if it's not a full-re-spray on a brigade搏 run could cost way over 15,000 pounds. So far, so good. It's all trim off and they've already got all of them. That is no. My dad said to take the jaw trim off so we can remove things like the wing mirror and the door handles. So we can make sure that all the wrap is actually off the car and right now I'm having to strip down this rear bumper because it seems like I haven't really got away with the paint on this one.
-
38:53
, obre el vídeo en una pestanya nova
So to get this mirror off, if it's like the loopo, there's a grub screw inside there which is holding the mirror to the store. Oh my god, no. If it's great, we can't go in the front. No pressure here. I think that's the difference. Damn. There's a brigade mirror I can't get. But whilst was trying to get this out, I've got a bit look at what are the chances? You drove a bit more than as well. Or do you quit as well? Or maybe a glass. We have with a rabbit. Or do that right now? Somehow there was a new mirror glass listed on eBay with that same Arabic writing so straight away I bought it. The guy aboard the mirror I've just said is accidentally broke it. I can have it three of charge. Could we meet one good one out of two bubbles? That one's probably a bit better in it. Sometimes things just don't go right. But luckily the paint on the doors seem all okay. Rebum goes to the body shop because it's a bit herish. As for the rear bumper, that's a different store and I've still got the rear quarters to go. Which so far aren't looking too bad. After one side, I'm a dozen another. Me and Liam took the wrap off the engine cover and then I moved on to the front wings which are also in that light blue. I don't think we've done too bad. Here's the situation then so far. This is why it's always a little bit risky buying a wrapped car. The actual paint underneath. Ain't that bad. The PFF's come off the roof but the paint under it is pretty good. I'm going to get this re-PFF to protect it. The paint on the door again is pretty good. It's nice. I'm going to change this colour combination but it's not really the paint that's the issue. It is the wrap. I think this car has been wrapped so many times that you can see there's like a adhesive still stuck in all these places in there and we try to everything to get it off. We try to absolutely everything to get off. I think literally the adhesive is melted into the lacquer and it's on like so many panels. On here there's like still little bits of adhesive off there. We try to absolutely everything. A adhesive removed we've got white spirit. We've got petrol. We've got thinners. We've got everything on it and it's still we've got steamer. We can't get that off. So what we're going to do definitely with the front bumper that's going to go to the body shop and that may have to have a bit of paint or some lacquer. Again it's a few of the bits before we start customizing and changing the colour. There's a last bit of wrap to come up and it's underneath the wing. So I've got to lift the wing up to get to that if we're going to unfold it or anything. To do that I've got to start it and the good news about starting it is that map sensors have arrived. Hopefully this will solve the running issue completely. Although it does seem to run pretty good now. We'll input the new map soon. We can also put the air filter within as well and that'll finish the full service. So let me show you guys a map. Put them in. Start it. Wing up. Hopefully it runs good. Let's see. Okay. Here are the map sensors. Pretty similar often. I would notice that there is two extra little pins in there. A little pins which these ones don't have but they do look they still look longer than they are still longer. Maybe they're not the right ones. Who have been scammed twice. But we've ordered the same ones twice and the same things have come with the same part number. But they're definitely longer in there. That is world different. It's the same but different in it. That's so weird. That's twice we've ordered the same part number and twice we've got a different
-
43:15
, obre el vídeo en una pestanya nova
map. What is going on? Now the map sensors on the begotty have a part number of 07c 906461 and I found the exact same part number listed on eBay just within A at the end. But they seem to be slightly different. Before we send back second map sensors because they're different again. If the actual sensor instead of the house in works, then we'll take it out. It's just got a little security key which we don't have like with the little hole in the middle. But we can get that by like cutting it and making it a screwdriver. But what we're going to do, I'll put these in. I see how it runs with this in. It is always worth it try before we send these back. The actual map sensor could be exactly the same and work properly. It's just the house in is a little different but that still means we can switch over the sensor into the house in on the original map sensors. Okay, let's see how that runs. If that works, we'll take the actual sensors out and put them into the original house in. Goal is to get the wing up and also for the car to room good. Here we go. That's the best cold start. That brand new. Yeah that was the best cold start. It looks like these map sensors are actually working and if cured that lumpy idol. So there's only one job left to do now to get it running a hundred percent and I was making a small slit in the secure E-keys so we could use a flat edge screwdriver and remove the map sensors out of these houses and put them in to the big galley houseings. And once I've done this hopefully the big galley will be running up with no lumpy idol and a smooth as it should be. This is getting me super excited now. We may have just cracked it all. Who maps that in we're looking at the next step? Look what we have. I'm going to leave it up to you guys to decide or figure out where they've come from. What car? Take your guesses in the comment section below. But look at it. They fit lovely, don't know. Oh it fits. There's one thing I've got to put the covers on. There's one thing that I've noticed and you guys might have noticed as well is that these are lovely and blue. But these are offending me. I don't know why but it feels like we're in a blue suit and then white shoes. Think like we're just going to match the shoes. So I'm going to take these off as well and I'm going to take them to the body shop to get a match with that blue so it all kind of like has a nice color match with a silver and blue combination that we've got going on. For now let's put these covers on and then we'll get that to the body shop as long as they're rest to the heart. There are foods of plastic covers to go on each side now to pretty much finish the engine bail. The cannacler we're nearly there now. There was one thing I've decided to do it. I've committed to it. We've got a new exhaust for it but first we need to remove the standard one. I don't know how different this is different. It's going to sound the sheer on one. We took out the second recap that the very wrong. It doesn't have a second recap. It only has primary caps then the back box. It'd be interesting to see what this sounds like. They're not the best sounding cause in the world but if we can approve it a little bit it will be interesting. The cool thing about the veiron is that when you have the rear wing or you're actually able to see the new exhaust which is one of the reasons why I'm decided to change it. Oh and even though this is titanium it's got to be at least 20 kilo but that's going to be
-
47:42
, obre el vídeo en una pestanya nova
replacing now with our new exhaust. And this is what you're going to be able to see when the rear wing is up on the big galley veiron. How cool is that? Look at this monstrosiset full titanium, nitromobile exhaust. Not a chromodium as made this exhaust for the veiron. That is absolutely insane. The weight is nothing. It literally done this by hand. It looks unreal. You can see it's the same shape but that has got zero sound in it at all. It's zero. I don't know whether it's going to sound as aggressive as the shiron. We don't know let's see. We was only one way to find out and put it on. Start it up. Here we go then. The second time I've ever fitted an aftermarket exhaust to a brigade. How the hell is that happened? The veiron portrait there is a lot easier than the shiron. There was just a heat shield we needed to remove the rear bumper and this small additional wing here. Then it all started in and it was ready for the first start. Magnific! That is looking sensation I went at. It looks way better than that big old lovely suitcases in the back. That's well over. What sounds like? What do you think? No is it? No is it? Yeah it's one of the max cards in it. There we go. Got a bit. Listen to repair. It's good to do. The hammer on is the washer fluid light. That's on but that's because the washer tank is in on and then we've got this suspension light but that's because it's on axle stance. So literally we've managed to completely service the car get it running really really nice and smooth now it's literally like sounds like a roll as always. You can actually pour penny on that. Let's see what this exhaust sounds like. I've got a sound on your power. I like it. I'm really well. I am one step closer now to get a moth veiron on the road completely faultless and without any help from brigade. Most of these parts we've been able to cross reference ourselves and save so much money. But for the parts that we haven't been able to cross reference I do want to say a massive thank you to Simon Furl on the short and as out with those parts. And if by chance you're watching and you do have a very run. I'd definitely be advising you to take it there for its annual service. Okay before we find out how much we saved in total by doing this ourselves and taking it to brigade I've got something pretty exciting. This is the fuse. You could say the million dollar fuse which stockters or stock this car from actually moving and we put it in a frame I'm going to sign it and with the new HXWBT Merch Drop which we've got the t-shirt on now the socks we've got hats as well all different styles everything is dropped literally today there's limited number but the first 100 orders we're going to pick someone from that to take away this little art piece with the one million dollar fuse in which we're going to sign as well so I think that's pretty cool. Links in the description for that. Now let's see how much we saved in total. In total we've just service the car and fixed it and got it running perfect for £1193.80. That is some good step we're going to do all the cosmetic stuff and figure out how we're going to do top speed in it. Thanks so much for watching this video if you enjoyed it hit the subscribe button hit that thumbs up button and I'll see you in the next video peace out.