Un adaptador 3D fa funcionar els teleconvertidors Vivo a l’OPPO Find X9 Ultra: resultats i riscos
Un creador ha combinat dos dissenys impresos en 3D per muntar els teleconvertidors de 200 i 400 mm de Vivo a l’OPPO Find X9 Ultra. La prova és prometedora, sobretot amb el 400 mm, però la compatibilitat és parcial i el muntatge per fricció exigeix molta precaució.
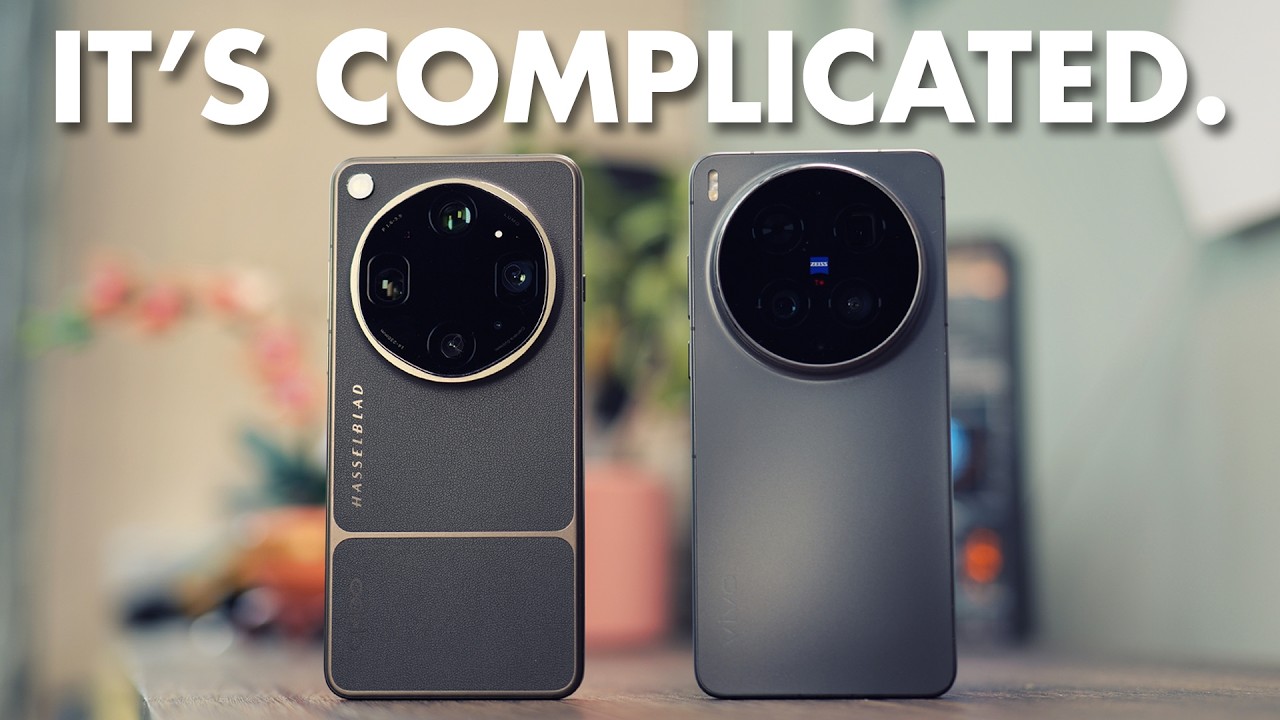
Un adaptador imprès en 3D pot convertir dos ecosistemes fotogràfics incompatibles en una combinació sorprenentment útil. Això és el que mostra NEON AIRSHIP en una prova amb l’OPPO Find X9 Ultra i els teleconvertidors externs de Vivo: una peça petita, creada a partir de models ja existents, permet encaixar les lents Vivo al suport del telèfon d’OPPO.
El resultat més interessant és el teleconvertidor Vivo de 400 mm equivalents, que al vídeo ofereix una imatge estable i detallada fins i tot en gravació a mà. El model de 200 mm també produeix fotografies convincents, però la seva estabilització es comporta de manera molt més erràtica en vídeo. És una demostració enginyosa, tot i que no converteix les lents en accessoris oficialment compatibles.
Com s’ha construït l’adaptador
El creador parteix de dos models publicats a MakerWorld. El primer contenia la geometria de la muntura del kit fotogràfic de l’OPPO Find X9 Ultra; el segon reproduïa una tapa posterior per a les lents de Vivo. Va extreure les dues muntures i les va combinar amb Tinkercad fins a obtenir una sola peça: OPPO en una cara i Vivo en l’altra.
La idea resol la part mecànica del problema. En lloc de portar dos jocs de teleconvertidors —un per a cada telèfon—, una persona que ja disposi de lents Vivo pot reutilitzar-les amb l’OPPO. També pot ser una alternativa quan el teleconvertidor oficial d’OPPO és difícil de trobar o té un preu elevat.
Ara bé, unir físicament dues muntures no garanteix una compatibilitat completa. L’alineació òptica, la distància exacta entre elements, les toleràncies de la impressió, el perfil d’estabilització i el processament de la càmera continuen pensats per a l’accessori oficial.
La prova: 400 mm molt convincent, 200 mm amb límits
La comparació es grava en 4K a 30 fotogrames per segon dins del mode de teleconvertidor Hasselblad de l’OPPO. Primer es mostra la lent oficial i després el teleconvertidor Vivo de 400 mm amb el mateix enquadrament general. Segons el creador, la qualitat és molt bona i l’estabilització a mà resulta fins i tot més sòlida del que acostuma a obtenir amb el telèfon Vivo.
Amb el teleconvertidor Vivo de 200 mm, la situació canvia. Les fotografies continuen sent aprofitables, però la imatge salta massa durant la gravació. La conclusió pràctica del vídeo és clara:
- El Vivo 400 mm G2 Ultra és la combinació més prometedora per a foto i vídeo.
- El Vivo 200 mm G2 pot funcionar bé en fotografia, però no és recomanable per a vídeo a mà en aquest muntatge.
- El telèfon no identifica la lent real: la marca d’aigua continua indicant 300 mm, perquè el programari assumeix que hi ha connectat el teleconvertidor d’OPPO.
Aquest últim detall és important. La imatge pot semblar bona, però les metadades i els algoritmes no saben quin sistema òptic tenen al davant.
Què ofereixen els sistemes oficials
OPPO descriu el seu Hasselblad 300mm Explorer Teleconverter com una lent de 16 elements que es munta sobre el teleobjectiu 3x del Find X9 Ultra i arriba a una focal equivalent de 300 mm. La marca també integra estabilització i processament específics per a aquest conjunt. És, per tant, el perfil que el telèfon espera quan s’activa el mode de teleconvertidor.
Vivo, per la seva banda, presenta dos teleconvertidors Gen 2 per al X300 Ultra: un de 200 mm equivalents, més compacte, i un de 400 mm equivalents, amb una arquitectura òptica més gran i un pes oficial de 248 grams. Les xifres d’equivalència que publica Vivo es refereixen a l’ús amb la càmera teleobjectiu del seu propi X300 Ultra; muntar-los en un altre telèfon no conserva automàticament totes les especificacions ni les garanties de rendiment.
La prova de NEON AIRSHIP demostra que hi ha una intersecció física i òptica aprofitable, no pas una certificació entre fabricants.
Els riscos del muntatge per fricció
La peça impresa no incorpora el passador de bloqueig que normalment assegura una lent. Tampoc té un punt d’alineació visible. Cal identificar la pestanya més llarga de cada muntura, encaixar-la correctament i confiar en la fricció. Si l’usuari gira la lent sense voler, aquesta es pot desprendre sense prémer cap botó.
El creador deixa deliberadament una textura una mica rugosa a les superfícies on hi havia suports d’impressió, perquè considera que augmenta l’adherència. Tot i així, la força de subjecció pot variar segons el material, la calibració de la impressora, el desgast i la temperatura. Amb una lent de centenars de grams penjada del telèfon, una caiguda pot danyar tant el vidre com la muntura o el mateix mòbil.
Per reduir el risc convé:
- subjectar la lent amb una mà i evitar que tot el pes recaigui sobre el telèfon;
- comprovar l’ajust abans de cada ús i no forçar les pestanyes;
- utilitzar una corretja o un suport addicional quan sigui possible;
- reservar les preses llargues per a un trípode o una configuració estable;
- revisar la llicència dels models originals abans de redistribuir o vendre peces derivades.
Una prova útil, però encara no definitiva
El vídeo és una demostració pràctica, no una comparativa de laboratori. Per saber fins a quin punt el 400 mm de Vivo iguala o supera la lent oficial d’OPPO caldria repetir les preses amb exposició idèntica, comparar retalls al 100%, revisar les cantonades, l’aberració cromàtica, l’enfocament, el vinyetatge i l’estabilització en diversos escenaris.
També seria útil comprovar si la distància d’enfocament, la qualitat nocturna i la consistència del muntatge canvien entre diferents impressions de la peça. El vídeo, però, ja respon una pregunta valuosa: sí, les lents Vivo poden produir resultats útils al Find X9 Ultra amb un adaptador purament mecànic.
Conclusions
L’adaptador de NEON AIRSHIP és una bona mostra del que permet la impressió 3D: reutilitzar accessoris cars i superar una incompatibilitat creada per muntures propietàries. El teleconvertidor Vivo de 400 mm és el guanyador de la prova, mentre que el de 200 mm queda més orientat a fotografia que no pas a vídeo.
La contrapartida és igualment clara. No hi ha reconeixement electrònic de la lent, el processament continua configurat per al teleconvertidor de 300 mm d’OPPO i la peça no disposa de bloqueig mecànic. Per a una persona experimentada que ja tingui les lents Vivo, pot ser un experiment molt atractiu; per a un ús intensiu o sense marge per a errors, l’accessori oficial continua sent l’opció més segura.
Contrast i context
Fonts consultades
-
01
NEON AIRSHIP I made Vivo lenses work with the Oppo Find X9 Ultra
- 02
- 03
Font de treball
Transcripció amb marques de temps
Consulta la transcripció
-
0:00
, obre el vídeo en una pestanya nova
So, I wasn't going to make a long-form video about this, but this is working so well that I think it's worth sharing. Basically, I made this adapter that converts Vivo lenses to Oppo mount, so I can take my Find X9 Ultra, I can twist on this adapter, then I can take any Vivo lens, and I can use it with the Oppo. Now, I realize there aren't going to be tons of people that are looking to do this, but I do think there'll be some. For instance, I like to use the X3 Android Ultra as like a video camera, and I like to use the Oppo as my main phone and for photography. So, I'm often carrying both, and I'd rather not be carrying a bunch of different lenses for each phone when I could just carry one set. But yeah, that's a pretty niche use case. The other thing is this lens for the Oppo can be quite hard to find, and it can be quite expensive, whereas Vivo lenses are more readily available. Today, I'm going to tell you how I made the adapter, I'm going to show you how it performs, and then I'll tell you how you can get your hands on it. So, let's get started.
-
1:03
, obre el vídeo en una pestanya nova
So, I'm really bad at 3D modeling, but luckily, that doesn't matter because there's already some great designs on MakerWorld that I can steal. The first one I used is this one. I would shout out the username, I'll put it on screen, it's just a string of numbers, but this is for the X9 Ultra teleconverter, and it allows you to put it on the phone backwards and use it as a microscope rather than a telephoto, which is pretty cool. I stole the mount from that. The other one I didn't print out is by a user called Carl with some Chinese characters after that, and it was just a rear lens cap, basically a 3D printed version of the lens cap that comes on the back of the Vivo lens. I used Tinkercad to mash these two designs together until I ended up with this thing, which is Oppo mount on one side, Vivo mount on the other. But with that said, let's go outside and see what the Vivo lenses look like on the Oppo Find X9 Ultra.
-
1:56
, obre el vídeo en una pestanya nova
Okay, to start things off, we're going to do a little comparison. I'm filming at 4K 30 in the Hasselblad teleconverter mode. And this is with the official Oppo lens adapter attached. Okay, now this is the exact same shot, but I've got the Vivo 400 mil lens attached. I'm not sure if it's actually more zoomed in or not. But I think you'll agree the quality looks great. And my main worry was the stabilization. But this is all handheld. And I think it looks pretty stable, more stable than it does on the Vivo even. Okay, now I've switched over to the 200 mil. I'm using the G2 one, so it's lovely and tiny. But I'm sure you can already see stabilization is a bit of a problem. It works fine for photos, but I don't think you can really use the 200 mil for video. It just jumps about too much.
-
2:46
, obre el vídeo en una pestanya nova
[music]
-
3:21
, obre el vídeo en una pestanya nova
[music]
-
3:46
, obre el vídeo en una pestanya nova
So there you have it. I'm so pleased of how these images and videos turned out. I'm genuinely shocked by how well these Vivo lenses work on the Oppo Find X9 Ultra. Obviously, the 400 mil works best, especially for video, but the 200 mil works really well for photography. Um a lot of the images that I showed were taken with the 200 mil lens. I just can't remember which ones are which cuz the watermark always says 300 mil cuz obviously it's not the lens it's expecting. Now, if you want to print one of these and try it for yourself, I've spent the last week setting up my Patreon and I've made the STL available to download on there completely for free. You do have to follow me, but once you follow me, it's free to download. If you don't have a 3D printer and you want me to print one for you, sign up for the higher tier. It's £6. You only have to do 1 month. Cancel it after you've got your 3D print if you want. So, yeah, the Patreon's link down below if you want to check that out.
-
4:40
, obre el vídeo en una pestanya nova
A couple things you might want to know if you do decide to get one of these, there's one foot on each mount that's bigger than the other. Um there's no dot to align it, so you just have to look at the lens and look at the mount and figure out which side has the longest foot and line it up that way. And also, there's no locking pin like normally a lens would lock in with this pin, but with this adapter, neither will lock, so you just have to be careful because if you twist it, you can pop it off without pressing this little button in. Just something to keep in mind. It's all just friction fit, but it's tight enough that it's been working well for me. I don't know how well you'll be able to see this on camera, but the way I've printed it, I had support material here on the inside of this mount and underneath each foot on this side, too. And that makes a slightly rough surface, which I could just sand off and make it look all polished and nice, but I think that adds a bit of extra grip to stop the lens from rotating. So, yeah, I've been leaving the surfaces a little rougher because I think it helps with the friction. But yeah, that's it for this one. If you like this kind of thing, get subscribed cuz I'm always playing about with different phones and different lenses. Thanks for watching and I will catch you in the next one. Toodles. >> [music] [music]